Imagine transforming your entire yard in just a few days with a lush, green lawn—no waiting for seeds to sprout or battling uneven growth. Sod Installation is the solution that delivers an instant, vibrant landscape, making it an ideal choice for homeowners seeking immediate curb appeal and long‑term lawn health. In this comprehensive guide, you’ll discover everything you need to know—from pre‑installation preparation and choosing the right turfgrass to step‑by‑step installation techniques and post‑installation care. Whether you’re planning a DIY project or considering professional help, this article will equip you with practical tips on soil preparation, laying sod correctly, and maintaining your new lawn, ensuring that your investment pays off with a thriving, low‑maintenance yard.
With clear instructions and expert advice, we’ll cover the entire sod installation process—including essential tools like sod cutters and rollers, and strategies for proper watering and grading. You’ll learn how to evaluate your lawn’s condition, prepare the soil effectively, and lay down high‑quality turf designed to last. Get ready to dive into a step‑by‑step roadmap that simplifies the process and boosts your home’s appeal and value. Let’s explore how to achieve a flawless, professional-looking lawn through a process that’s as straightforward as it is rewarding.
a. Why Sod Installation?
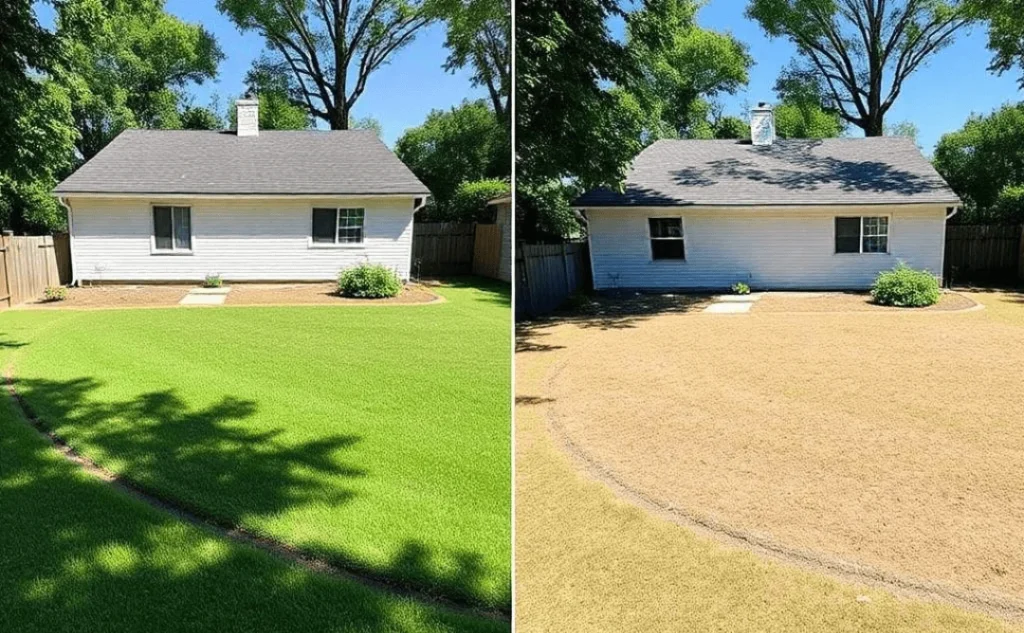
Sod installation offers a transformative solution for homeowners seeking an immediate, lush, and uniform lawn. Instead of waiting weeks or even months for grass seed to germinate and establish, laying sod provides a fully mature turf almost instantly, giving your property instant curb appeal and a rapid boost in value. Here’s why sod installation is a compelling choice:
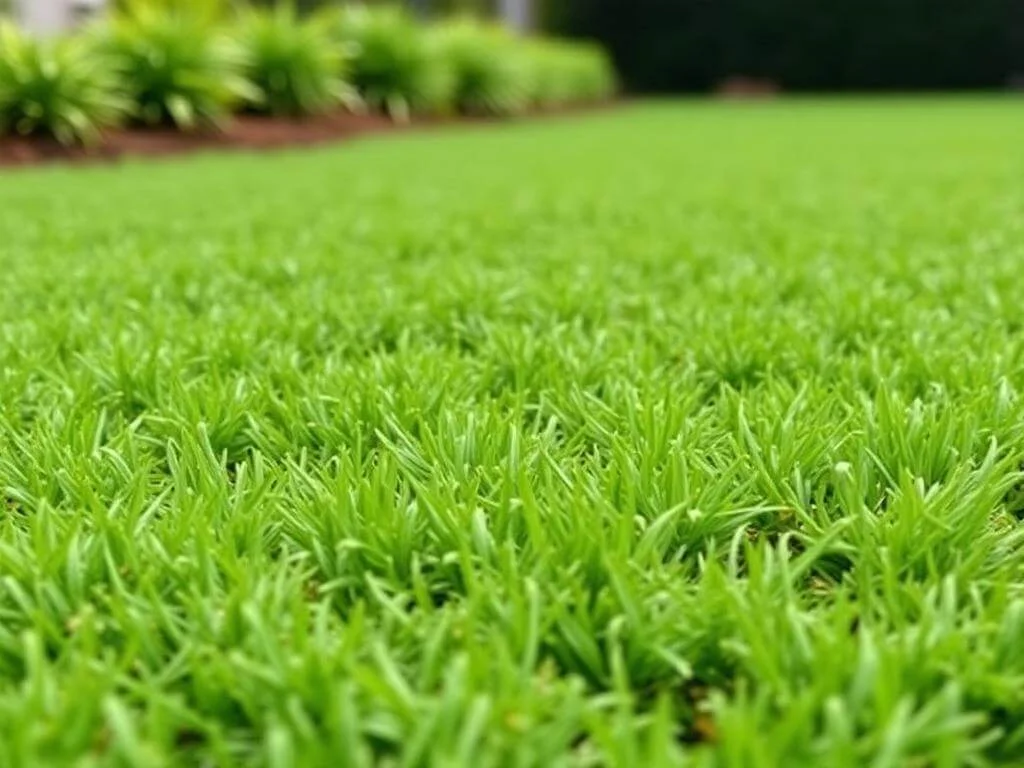
1. Instant Transformation:
By installing sod, you bypass the lengthy germination process associated with seeding. This means your lawn looks green and vibrant from day one, which is perfect for enhancing curb appeal and making a strong first impression.
2. Enhanced Lawn Health:
Properly installed sod creates a dense, uniform cover that can reduce weed pressure and soil erosion. With a well-prepared soil base and professional installation, the sod establishes quickly, leading to a healthier, more resilient lawn that requires less initial maintenance.
3. Improved Property Value:
A freshly installed lawn contributes significantly to the overall aesthetic and market value of your home. Whether you’re planning to enjoy the space yourself or eventually sell, investing in sod installation is a smart way to improve your property’s appeal.
4. Time and Cost Efficiency:
Although sod installation may have a higher upfront cost compared to seeding, the benefits of immediate results and reduced long‑term maintenance can make it more cost‑effective. Homeowners enjoy a hassle‑free process with less time spent on ongoing care during the critical establishment phase.
5. Professional Results:
When performed by experts, sod installation involves meticulous soil preparation—such as rototilling, grading, and the application of starter fertilizer—that ensures optimal root contact and long‑term success. This process not only sets the stage for robust turfgrass installation but also minimizes future maintenance issues.
By choosing sod installation, you’re opting for a method that delivers fast, durable, and aesthetically pleasing results, making it an ideal solution for those looking to renovate their lawn quickly and effectively. This approach not only meets the immediate desire for a beautiful yard but also lays a solid foundation for ongoing lawn care and maintenance.

b. Pre‑Installation Preparation
A successful sod installation starts long before you unroll the fresh turf. Pre‑installation preparation is critical to ensure that your new lawn establishes quickly, remains healthy, and looks professionally finished. Here’s how to prepare your site for a flawless sod installation:
- Site Assessment and Planning
- Measure Your Lawn: Accurately determine the area where sod will be installed. Use a tape measure or digital tool to calculate the square footage, which helps in ordering the correct amount of sod and estimating costs.
- Evaluate Conditions: Consider factors such as sunlight, drainage, and soil type. A thorough site assessment identifies potential challenges (e.g., slopes, poor drainage) that might require special preparation or additional tools.
- Clearing the Area
- Remove Old Grass and Weeds: Before laying new sod, clear the area of any existing grass, weeds, and debris. This step may involve using a sod cutter to neatly remove the old turf, ensuring a clean slate for the new installation.
- Debris Removal: Dispose of any rocks, roots, or other materials that could interfere with sod adherence. A clean surface promotes better contact between the sod and the soil.
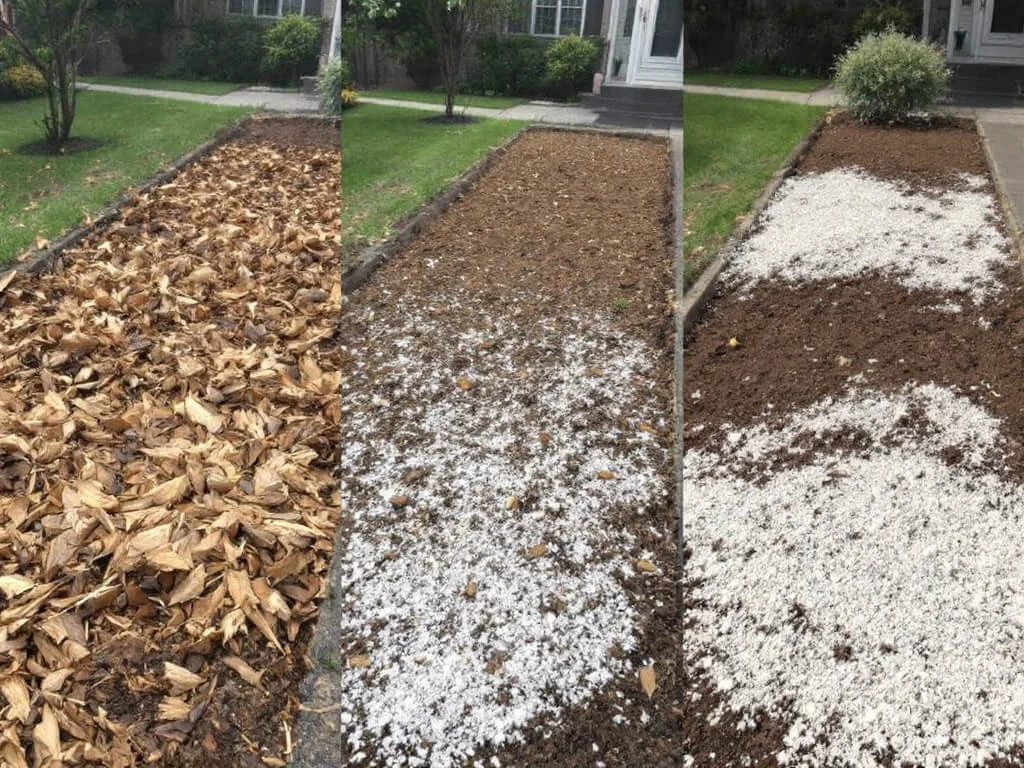
- Soil Preparation and Amendment
- Test and Amend the Soil: Conduct a soil test to assess pH and nutrient levels. Based on the results, amend the soil with compost, starter fertilizer, or other organic materials to create an ideal growing environment for your turfgrass.
- Rototilling and Grading: Use a rototiller to loosen the soil and improve aeration, then grade the area to ensure it is level. Proper grading not only supports even sod installation but also promotes effective water drainage, reducing the risk of waterlogging or erosion.
- Planning for Irrigation
- Irrigation Considerations: Evaluate your current irrigation system or plan for a new one. Proper watering is essential during and after sod installation. Make sure that sprinklers or drip systems are in place, or plan for manual watering during the critical first few weeks.
- Gathering the Right Tools and Equipment
- Essential Tools: Prepare or rent necessary equipment such as a sod cutter, rototiller, rake, and roller. These tools help ensure a smooth, efficient installation process and a strong connection between the new sod and the prepared soil.
By meticulously preparing your site through careful planning, thorough clearing, and proper soil preparation, you lay the groundwork for a durable, attractive lawn. This pre‑installation phase is crucial for a successful sod installation that not only looks great from day one but also thrives with minimal maintenance in the long run.
c. The Sod Installation Process: A Step‑by‑Step Guide
A successful sod installation not only gives you an instant, lush lawn but also sets the stage for long‑term growth and minimal maintenance. Follow these steps to ensure a professional-looking result:
1: Planning and Design
- Measure Your Area:
Begin by accurately measuring the square footage of your lawn. This determines the amount of sod needed and helps you plan your budget. - Determine the Layout:
Plan the layout of your new lawn. Consider the natural contours of your yard and design a pattern that minimizes seams—stagger the sod pieces much like a brick wall to ensure a seamless look. - Identify Obstacles:
Note any features such as flower beds, trees, or pathways that might affect the installation. Mark these areas so that you can make precise cuts later.
2: Clearing and Soil Preparation
- Remove Existing Turf:
Clear the installation area by removing old grass, weeds, and debris. A sod cutter can help remove the old turf in neat, manageable sections. - Improve Soil Quality:
Test the soil’s pH and nutrient levels. Based on the results, amend the soil with compost or starter fertilizer to create a nutrient‑rich base for your new turf. - Rototill and Grade:
Use a rototiller to loosen the soil, then rake and grade the area to achieve a smooth, even surface. Proper grading enhances water drainage and provides a uniform base for the sod.
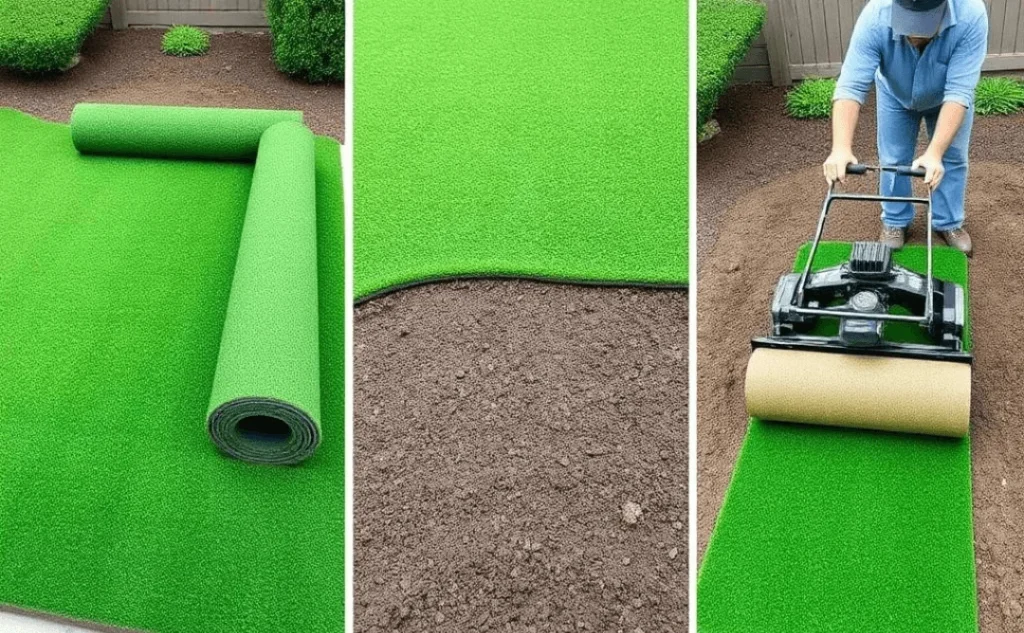
3: Laying the Sod
- Start Along the Longest Boundary:
Begin laying sod along the longest straight edge of your yard. This provides a reference line and helps ensure that subsequent rows remain straight. - Stagger the Seams:
Lay each piece of sod tightly together and stagger the seams like bricks. Overlapping edges slightly (without piling them) minimizes gaps and encourages better root establishment. - Cutting for Fit:
Use a sharp knife or a sod cutter to trim sod pieces around curved or irregular boundaries. Make sure the cuts are clean to maintain the uniform appearance of your lawn.
4: Rolling and Watering
- Roll the Sod:
After all pieces are in place, use a lawn roller to press the sod firmly into the soil. This step is crucial for ensuring good contact between the roots and the soil, which accelerates establishment. - Initial Watering:
Immediately after installation, water the entire area thoroughly. The first heavy watering helps settle the sod and activates the starter fertilizer, initiating root growth. - Establish a Watering Schedule:
For the first couple of weeks, follow a light, frequent watering schedule to keep the sod moist without overwatering. Gradually reduce the watering frequency as the sod begins to establish.
5: Post‑Installation Care
- Monitor and Adjust Watering:
Keep an eye on soil moisture and adjust your watering schedule as necessary. Newly installed sod requires consistent moisture for the first few weeks. - Wait Before Mowing:
Allow the sod to root firmly (usually about 2–3 weeks) before the first mow. When you do mow, set your mower to a high setting to avoid cutting more than one‑third of the grass blade. - Ongoing Maintenance:
After the initial establishment phase, maintain your lawn with proper fertilization, regular mowing, and periodic aeration. This continued care helps secure the long‑term health and appearance of your sod installation.
By following this step‑by‑step guide, homeowners can achieve a professional-quality sod installation that not only looks fantastic immediately but also establishes a strong, healthy lawn for years to come. Each step—from precise planning and thorough soil preparation to meticulous laying, rolling, and post‑installation care—is critical in creating an inviting outdoor space that enhances your home’s curb appeal and overall value.
d. Cost Considerations and Maintenance
1. Cost Considerations
Investing in sod installation comes with upfront expenses, but understanding the cost factors can help you make an informed decision:
- Lawn Size and Sod Quantity:
The overall square footage of your lawn directly impacts the amount of sod needed. Larger lawns will require more sod and, consequently, have a higher cost. Look for terms like “sod installation cost per square foot” to compare pricing. - Labor and Installation Fees:
Professional installation costs can vary based on local labor rates and the complexity of the job. Factors such as site accessibility, slopes, or the need for additional work (like removing old sod) may increase labor costs. Using long‑tail phrases like “professional sod installation pricing” helps set clear expectations. - Soil Preparation and Amendments:
Proper soil preparation is crucial for the long‑term success of your new lawn. Expenses may include clearing old turf, rototilling, grading, and adding compost or starter fertilizer. Although these costs add to the initial investment, they also contribute to a healthier, longer‑lasting lawn. - Additional Services:
Some homeowners may opt for extra services, such as installing or upgrading irrigation systems, which can affect the overall cost. It’s wise to request a detailed estimate to understand which services are included and which might incur extra charges.
2. Maintenance Considerations
A key advantage of sod installation is the immediate transformation it offers. However, ongoing maintenance is essential to ensure your new lawn thrives:
- Watering Schedule:
Newly installed sod needs consistent moisture to establish roots. Expect to water heavily for the first few days, then gradually taper off as the sod becomes established. Keywords like “watering new sod” and “sod installation watering schedule” capture this essential maintenance step. - Mowing Guidelines:
Wait until the sod has rooted firmly—usually after 2 to 3 weeks—before mowing. When you do mow, set the mower at a higher setting to avoid cutting more than one‑third of the grass blade, ensuring the turf remains healthy and stress‑free. - Fertilization and Weed Control:
Begin fertilizing approximately 6 weeks after installation to promote steady growth. Regular weed control is also important during the early maintenance phase to prevent competition with your new turf. These practices help extend the longevity of your sod and maintain its appearance. - Long‑Term Lawn Care:
In addition to initial care, routine lawn maintenance—including periodic aeration, proper irrigation adjustments, and seasonal overseeding—ensures that your sod remains robust over time. Incorporating terms such as “lawn maintenance for new sod” and “ongoing turf care” reinforces the long‑term benefits of proper care.
By carefully considering both the cost factors and the necessary maintenance routines, homeowners can weigh the benefits of sod installation against its initial investment. While the upfront costs may be higher compared to seeding, the rapid transformation, lower maintenance demands once established, and improved curb appeal often justify the expense. A well‑planned sod installation coupled with proper ongoing care will not only create a beautiful lawn but also enhance your property’s overall value over time.

e. Frequently Asked Questions (FAQ)
1. How long does sod installation take?
The duration of a sod installation project depends on the size and complexity of your lawn. For a typical residential yard, the process—from site preparation and soil amendment to laying, rolling, and initial watering—usually takes one to two days. Larger or more complex properties may require additional time.
2. How long does sod take to root?
Under optimal conditions, sod generally begins to establish roots within 2 to 3 weeks. Full establishment can take up to 4 weeks, depending on factors such as soil quality, weather conditions, and proper post‑installation care.
3. What should you put down before laying sod?
Before laying sod, it’s important to prepare your soil properly. Apply a starter fertilizer or compost to enrich the soil and promote rapid root growth. In some cases, you may also add a thin layer of topdressing or organic matter to create a nutrient‑rich, well‑draining base for your new turf.
4. What is sodding?
Sodding is the process of installing pre-grown grass—cut into rolls or sections—to create an instant lawn. This method provides immediate results, offering homeowners a lush, green lawn without the wait for seeds to germinate.
5. What is the best month to lay sod?
The optimal time to lay sod typically falls during the cooler months of early spring or fall, when temperatures are moderate and the risk of extreme heat or cold is minimized. These periods allow the new sod to establish roots more effectively. However, the best month can vary by region, so it’s wise to consult local experts or weather patterns in your area.
6. Can I just lay sod over dirt?
While it’s possible to lay sod directly over dirt, the soil must be well-prepared and free of debris, weeds, or compacted layers. Proper soil preparation—including tilling, grading, and amending with compost or fertilizer—ensures that the sod will have good contact with the soil, leading to better root establishment and a healthier lawn.
7. Can you lay sod without tilling?
It is possible to install sod without tilling, but this approach is generally not recommended unless your soil is already loose, nutrient-rich, and free of weeds. Tilling helps to aerate the soil, remove existing vegetation and debris, and improve nutrient absorption—all of which contribute to optimal root growth and long‑term lawn health.
8. How do labor and additional services affect sod installation cost?
Apart from the cost of the sod itself, factors such as labor, soil preparation, removal of old turf, and installation of irrigation systems can impact the overall price. It’s important to get a detailed estimate from your installer that outlines all costs so you can plan your budget accordingly.
9. When is it safe to mow after sod installation?
You should wait until the sod has established a strong root system—usually 2 to 3 weeks—before mowing. When you mow, set your mower to a high setting (cutting no more than one‑third of the grass blade) to avoid stressing the new turf and ensure continued healthy growth.
10. What are the most common mistakes to avoid during sod installation?
Common pitfalls include insufficient soil preparation, improper alignment or staggering of sod pieces, overwatering or underwatering, and not removing old turf or weeds properly. Following a structured, step‑by‑step process can help avoid these issues and ensure a successful sod installation.
This FAQ section covers essential aspects of sod installation—from preparation and process to costs and maintenance—ensuring your content is comprehensive, informative, and optimized for both readers and search engines.
Conclusion
In conclusion, sod installation offers homeowners an immediate and effective solution for establishing a lush, green lawn. The process provides instant results, transforming bare soil into a mature lawn ready for use in a matter of hours. Beyond aesthetics, sod plays a crucial role in soil erosion prevention, acting as a protective layer that stabilizes the soil and reduces the risk of erosion. theturfgrassgroup.com Additionally, the sod requires less irrigation compared to seeding, as it arrives with an established root system that efficiently retains moisture. woernerturf.com While the initial investment may be higher than seeding, the benefits of immediate usability, erosion control, and reduced maintenance make sod a valuable choice for homeowners seeking a durable and attractive lawn.